Continuity editing is a style of editing used by Hollywood film makers to make films appear seamless in their final form to encourage the audience to engage further into a film. The main rules of Continuity editing are 180 degree rule, match on action and eye line match.
I personally found the SLR camera easy to use on the basic level that we needed to use it on. We used functions on the camera such as zoom and playback. After we had finished taking shots we uploaded them onto a computer using the Micro SD Card that was inside the camera while taking the shots.
Organising the film was simple in my opinion because it was not long enough to require alot of arrangements. To be better organised I could of made a plan before hand of the order we would record the shots.
It was my first time using a digital camera. I learnt about the play back function and the zoom. I also learnt you need to give the camera about three seconds after you press the record button to start filming properly as it may cut some of the recording short. To upload the videos onto a computer I had to use a firewire cable open up Adobe Onlocation and playback the video using the playback tool on the camera to make a copy on the computer.
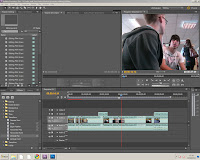
 Now that we had the recordings we had to edit them into something viewable with all the continuity edits used. I found Premiere hard to use at first and then I slowly learnt how to use it when I gained experience. At one part we had to remove the video and keep the sound of a shot so we could use another video to make the whole thing run more smoothly. We used vertical flip to make the corridor shot run more smoothly.
We then uploaded our video onto YouTube by making an account and from there it was pretty simple to upload but took a few minutes. To put it onto my blog I had to go onto the Edit HTML tab and paste the Embed code of the YouTube video onto it.
I enjoyed using Blogger because it is a fun alternative to writing essays on paper or Word. I liked the fact I could insert pictures and move them about.


Proficient evaluation of the process of completing your continuity exercise and your use of technology. Some useful images to illustrate the process.
ReplyDelete